Author: admin

How to Make a Brick Garden Path

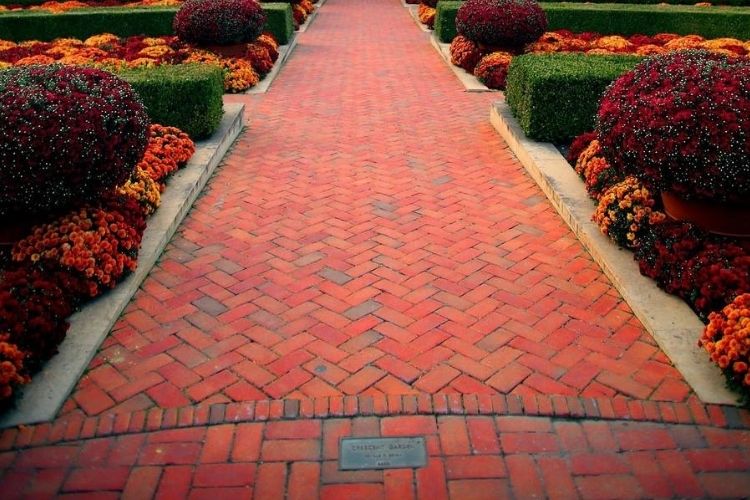
Brick has traditionally been considered a building material used in the construction of walls, fences and barriers. However, its capabilities are much wider. One popular application is paving paths. For those who are not afraid to try their hand at new types of work, it will be useful to learn how to make a garden path out of bricks. Moreover, there is nothing super complicated in performing such an operation independently.

Preparation of tools and materials

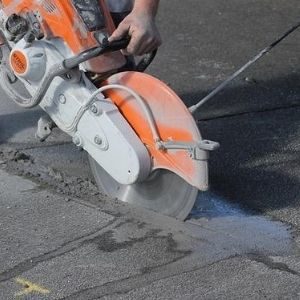
In order for the work to be successful, and the result to please for many years, it is important to have a set of the necessary tools at hand. As for the materials, they usually take old bricks or those that remained after the completion of construction on the site.

What tools are needed for paving

To complete the work, you will need the following set of tools:

  • shovel
  • vibratory plate;
  • rubber hammer
  • Best Concrete Saws
  • builder's level
  • rule;
  • tape measure
  • thin cord;
  • metal or wooden stakes.

To facilitate work, the manual rammer can be replaced with an electric or gasoline rammer.

Materials required for work

The work will need the following list of materials:

  • brick;
  • sand;
  • cement;
  • gravel;
  • geotextile.

In most cases, the remains of the stone after construction are used to pave the garden path. Also good at work is the old brick, obtained during the dismantling of buildings erected in the first half of the 20th century or even earlier. By the way, it is not necessary to use whole stones. Paths in the country and from broken bricks will look good. Elements of different sizes will add a special charm to the finished product. And if these are old stones that differ in color, then this will make your paths unlike any others.

The sequence of actions during construction

You need to start by planning the future track. If no intensive movement of people is expected, then a width of 80–100 cm will be sufficient. Be sure to pay attention to the proximity of large trees. The distance to them should be at least 60–70 cm. Otherwise, the powerful roots of a growing tree can destroy the path. It is best to plan future walking routes before fertile soil is introduced to the site. This will reduce the amount of earthwork.

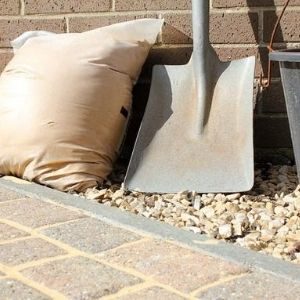
For ease of operation, the contour of the future track is indicated with stakes and a stretched cord. It is advisable to repeat its shape as accurately as possible. After that, a shovel removes a layer of earth within the area limited by the cords. The thickness of the removed layer depends on how the bricks will be laid – flat or rounded, and the thickness of the gravel-sand substrate.

Then a layer of gravel is poured into the prepared bed. It will act as a drain. After laying and leveling, the gravel is tamped. The next layer is laid with a geotextile cloth. This material will allow water to seep down without problems, and for germinating weeds, it will become an insurmountable obstacle.

The next step is to install the curb. It will fix the stones, prevent them from creeping to the side under the influence of mechanical influences and natural precipitation. The functions of the curb can be performed by the same brick installed on the edge, or a traditional curb stone. Wooden boards, fixed with stakes, can become temporary bumpers. Instead, it will be possible to pour a concrete curb later.

Next, clean sand or a cement-sand mixture is poured over the geotextile. The proportion of 1: 5 will be enough. The resulting layer is aligned with the rule. This tool will allow you to make the surface not only flat, but also tamp it a little.

Laying the finishing coating

Laying is done with a rubber (rubberized) mallet. Each brick is gently tapped to the base. During the laying process, the plane is continuously monitored. It is important to remember about a slight slope to one of the edges for rain and melt water to drain. Adjacent bricks should have a small gap of 1–3 millimeters.

For the final fixation of individual elements, the track is covered with a cement-sand mixture and swept with a brush. The mixture enters the cracks, fills them and fixes the bricks. To be sure, this operation can be repeated several times.

To prevent the water flowing from the surface of the path from forming puddles, a drainage channel is broken along the lower edge. Through it, water will be discharged to a predetermined place.

As you can see, there is nothing complicated in this work. But it’s not for nothing that they say that a professional can handle any job better. Therefore, it is better to entrust the pedestrian recreation area at your dacha to specialists.

What is Soil Cultivation and How to Make it Right

The maintenance of a vegetable garden or dacha is associated with a large number of different agricultural techniques. Some of them are used in “manual mode”, while more effective methods involve the use of special techniques. On large areas, universal methods are used that cover several operations with soil at once. Let’s find out what cultivation is and how it is useful for the land.

What is this method of tillage

This is one of the most popular processing methods. It provides for plowing without seam turnover, while the moistened bottom layer is not brought to the surface.

Loosening, crumbling, as well as slight mixing of the upper section is provided for passes of different depths. If you look at the field after such an operation, then visually it seems that it seems to have leveled off.

In addition, the rhizomes of the weeds are cut in this way. And for the incorporation of herbicides or fertilizers on large areas, the non-moldboard technique is indispensable.

This method has other advantages:

  • when moving the top layer without further dumping it, moisture is better retained;
  • improved air access;
  • with a slight movement, beneficial microorganisms are activated that feed the soil;
  • the ground warms up faster, which saves time (this is especially true in early spring).

As a result, the seeds germinate without much difficulty.

Varieties of tillage

 the benefits of soil cultivation

At different stages of plant growth, the same different types of processing are used, the technology of which is significantly different. Let’s start with the most frequent intake.

Interspace Cultivation

This operation, as the name indicates, aims to work between lines of crops planted. It is one of the main elements of productive processing, which is used on crops of potatoes, beets, vegetables and corn.

There are no special requirements for inter-row “driving”, such cultivation is carried out as the plantings grow, and the number of treatments is determined as needed. If the weeds grow too actively, in addition, the soil is highly compacted – processing is carried out more often than on cleaned loose soils (at a depth of up to 14 cm instead of the usual 12).

It can be combined with fertilization or pesticide application, cutting irrigation holes and potato tending. In regions with wet soils, cultivation when working with root crops is traditionally combined with hilling.

Complete cultivation

In the spring, the soil layer compacted during the winter is loosened, thereby providing “drainage” and air circulation. The first approach is made shallow – about 6–16 cm. The specific figure depends on the state of the earth: in fast-drying fields, they take deeper.

Work with clean steam is carried out at depths of up to 12 cm, with repeated passes, the ripper is set to a maximum of 6 cm.Immediately before sowing, the depth is taken at the level of the seeds (note that the soil will give a slight subsidence). When planning furrow sowing, the “paws” are deepened by another 2-3 cm.

Both of these techniques may not seem so difficult, but their use is associated with a number of nuances that are worth considering separately.

Types of Tillers and How They Differentiate

Let’s start with the “props”. Depending on the type of processing and the area of ​​the site, the following types of cultivators can be used:

  • Manual. There are rotary and loosening. The first is a shaft with small diameter sprocket discs, which is attached to the handle. Convenient for processing tall cucumber beds and hilling potatoes. Loosening – the same handles, but already with sharpened teeth at the edges (there can be 3 or 5 of them). They are used in “cramped” conditions (greenhouses or with dense rows);
  • Front-tine Tillers and Rear-tine Tillers of different power. Small (up to 3 hp), medium (3–6 hp) and high power products are sold. The most “strong” units are equipped with motors of 6-10 “horses”. All of them differ in weight and functionality (the higher the power, the deeper and wider the grip of the “paws”). Ideal for a large garden, and a set of attachments makes them indispensable in the household;
  • Hinged mechanisms for tractors. This is already for a farmer in a big way. Such units are the most versatile and productive, but at the same time they require frequent maintenance and adjustment. Rowing mechanisms are used for inter-row passes, while spring cultivation of steamy soil with a simple tractor is carried out with the participation of a special steam “shed”.

We have already talked about the “working” depths, which are guided by when preparing the ripper. These tolerances are always respected, which will be confirmed by any agronomist. But it is unrealistic to achieve perfect accuracy in the field, therefore, a “indent” of one centimeter is allowed. When selecting the settings, factors such as the condition of the soil and the pressure on the working element (tooth or “paw”) are also taken into account. The more weight falls on such parts, the greater the depth will be.

Hinged mechanisms for tractors

Really high-quality cultivation of large tracts also implies the right choice of direction. So, the first seasonal plowing is always done across the previous (or at least at an angle), and presowing should not coincide with the direction of crops.

Much also depends on the qualifications of the tractor driver – the method of movement of the trailer mechanism chosen by him partly “lays the foundations” for the future harvest. Experienced drivers with the first continuous pass lead the mechanism by the shuttle method – the field is divided into corrals, and each is passed separately, intermediate patches are processed last. Many people choose the more complex diagonal cross mode. It is suitable for large, level fields where there are no particular obstacles.

Mechanisms with a very wide grip are triggered with overlap (the “squares” are then superimposed on each other). As you can see, there are subtleties here that the farmer has to keep in mind. The owners of a summer cottage or an impressive vegetable garden are often interested in something else – how the correct cultivation of a site is done with an ordinary walk-behind tractor.

Sources:

https://www.researchgate.net/publication/249253403_A_comparison_of_cultivation_techniques_for_successful_tree_establishment_on_compacted_soil

Watering the Garden

With a lack of water in the soil, plant development slows down or stops. Therefore, proper watering of the garden, garden and individual plants on the site is very important. Whether you are using a modern irrigation system or watering in the old fashioned way, it is important to understand how often, when and what plants to water in your garden.

When to water the garden?

The ideal time for regular watering in heat and drought is a calm late evening, when the heat has subsided, there is a cool night ahead, and moisture evaporation is minimal. Let’s allow watering in the early morning, before the onset of heat. However, if the plant looks dehydrated on a hot day, it should be watered immediately by throwing a hose down to the roots and keeping the leaves out of the water and causing a burn.

Often gardeners ask whether it is necessary to water the vegetable garden, garden and flower garden if it rains. To check how many centimeters the rain has soaked the soil in depth, stick your finger into the soil. One big rain in a hot season is not at all enough to wet the soil at the depth where the roots of most vegetables and ornamental plants are located. Usually, the soil can be properly soaked, not heavy, but long rain, which lasts several hours in a row. A simple rain gauge, which is installed in any open place on the site, will help to measure the amount of precipitation.

When watering is needed urgently

The first sign of dehydration of a plant is lost turgor, sluggish leaves and buds. If you do not make up for the loss of water at this stage by watering the plant abundantly, the leaves and buds will begin to turn yellow, dry and fall off, and soon the process will spread to the entire above-ground part of the plant. As long as the plants receive at least a small amount of moisture from the ground, the plant in most cases can still be reanimated by soaking in water and watering. Drying out of the root system means the death of the plant

Watering plants in the heat: what to water and how often?

If the weather is hot without rains, and the resource of water, time and labor is limited, then, alas, it will not work to water the garden abundantly and efficiently, the garden and the flower garden. This situation arises in our country during a drought, when local authorities announce a ban on watering garden plots with a hose (how much can you water by carrying water in a watering can from the tap to the right place in the garden?). During such periods, you have to set priorities and adhere to them strictly.

Watering is necessary for the following group of plants:

  • freshly planted seedlings in open ground
  • newly transplanted plants
  • plants in pots (especially small ones) and hanging baskets
  • plants in greenhouses
  • new crops and freshly laid grass bales
  • coastal and aquatic (aquatic) plants

In the second most important place for watering are plants that will not bloom or cannot successfully bear fruit without watering, as well as any other plants, depending on your goals (for some, these are vegetables and berries, and for others, ornamental plants).

It should also be remembered that in hot periods watering will definitely be required for areas located on light, sandy soils, because they dry out faster than heavy clay soils.

Watering Properly: How to Water?

Abundant and rare watering is preferable to stingy and frequent. A small amount of water penetrates only into the upper layer of the soil, contributing to the development of weak roots located at the surface, which are the first to suffer from drying out of the soil and from frost. The development of a strong and deep root system that can support the plant in the harshest weather conditions requires water to penetrate deep into the soil around the plant when irrigated. The correct depth of soil moisture for watering is about 60 cm.

Before watering the garden and the plants in the flower beds, loosen the soil around the plant and make a small hole so that the plant is in the middle of the depression. All water from irrigation will remain in this hole and, as it is absorbed, will get to the roots of the plant, and will not spread over the dry soil. With the arrival of rains, it will be possible to huddle the plant by leveling the hole with the surface level in order to eliminate stagnation of water around the plant. Where watering is not required, try as far as possible not to disturb the soil during a drought: any loosening contributes to additional evaporation of moisture.

Be sure to use mulching, which helps to preserve moisture in the soil and significantly reduces the required frequency of watering. Read more about mulching techniques.

Irrigation systems

If you are using an irrigation system, invest in a modern drip or jet system instead of the traditional sprinkler. The water delivered by such systems appears at the right time (late in the evening, even in your absence), thanks to the timer on the tap, it gets exactly as intended to the roots of the plant and is absorbed to the last drop, without being wasted on evaporation and watering the neighboring weeds.

Use the hose and sprinklers to water young crops of grass or freshly rolled lawn every day. Place a rain gauge (or just a glassware) in the spray area and finish watering when the water level reaches 13 mm (less will not be useful, and more will be wasted). Read our article on how to care for your lawn in hot weather.

An excellent watering agent is rain and melt water. Set up barrels in your garden to collect rainwater. These barrels are connected directly to a pipe that receives water from gutters located around the perimeter of the roof of a house, garage or greenhouse. The barrels are installed on an elevation so that you can substitute a watering can under the opening tap or connect a watering hose to it.


Benefits of Mineral Fertilizers in the Garden

Mineral fertilizers help plants grow more intensively and increase yields. These fertilizers are not completely natural, but their composition is easily absorbed by both garden and indoor plants. To use them correctly, be sure to read the instructions and observe the proportions indicated on the packaging. If the manufacturer states that the NPK fertilizer solution is 5 + 4 + 6, this means that it contains 5% nitrogen, 4% phosphorus oxide and 6% potassium oxide. When choosing, you need to take into account the properties, application time and requirements of the plants. Read More

Pruning Grapes. Stages and Timing of Trimming

In many cases this is due to the climatic zone, the strength of the grapes, etc.

Consider the periods of pruning covering grape varieties for the zone of risky agriculture, where winters are more severe and there is a danger of returning cold in spring.

In this case, grape pruning is carried out in two stages – in the fall (preliminary) and in the spring (final).

How to Prune Table Grapes for BEGINNERS

Pruning the vine in the fall

Autumn pruning, depending on the variety, age and strength of the bush, in turn, is divided into two stages.

  1. Pre-cut. It is carried out 1-2 weeks before the main pruning. During this pruning, unripe, green shoots are cut out. It is carried out until the first frost in early October.
  2. The main autumn (formative) pruning. Perform in mid-late October (the next day after the first frost). Approaching the bush, they inspect the entire bush as a whole and all available vines. Its condition is assessed – the presence of diseases, pests, damage from frost, etc.

After assessing the condition, the bush is clarified. All dry, broken, thin, poorly ripened, inconveniently located vines are removed. Next, the head of the bush is cleaned from the stumps of last year’s pruning. The most developed fruit vines are pruned into arrows. Old, very long, dried up sleeves with weak shoots or no annual vines are removed. Underdeveloped and fertile sprouts and spinning tops are cut out (if they are not needed for the formation and replacement of sleeves). Unripe tops are shortened.

Taking into account the risk of eyes freezing during the wintering period of productive vines, it is necessary to leave 40-50% more than is necessary to obtain a high yield. For the same reason, the shoots that will become replacement knots are pruned 60-70% longer. Depending on the variety, all vines are cut with a margin of 50% of the eyes. After pruning, the grapes are placed in grooves and covered for the winter.

During autumn pruning (preliminary and main), depending on the shape and size of the formation, from 50 to 70% of the annual growth is removed.

Pruning the vine in the spring

It is recommended to complete the spring pruning of grapes before budding begins. Before pruning, it is necessary to analyze the condition of the bush and estimate the percentage of dead eyes.

Based on the type of formation of the grape bush and relying on the rules, they carry out the final pruning, leaving the required number of fruit links (replacement knot and fruit shoot). When starting to trim the spare lengths that were left in the fall, it is necessary to determine the number of eyes to ensure a high yield in the current year.

After spring pruning, the care of the grape bush does not end. To ensure full development and high yield during the growing season, it is necessary to redistribute the vegetative and generative load by breaking out, pinching, pinching, and chasing.

How to Protect Your Garden From the Sultry Heat?

Temperatures over 30 degrees have a very detrimental effect on all green spaces in the garden. A person is not yet able to influence the ambient temperature, it is also not possible to shade all plants. So how do you keep your garden plants from the heat? Correct and timely watering is what can really help in this situation. Even heavy rains, especially those that occur occasionally, do not improve the situation, since very heavy rain can soak the soil by no more than 50 cm, while the root system of most fruit crops is much lower.

Necessary watering of garden trees and shrubs

Dry heat most often occurs in autumn and this is precisely the most dangerous situation for all fruit trees and berry bushes that grow in the garden. On many plants, flower buds of the next season are laid in the fall, and without sufficient moisture, such buds will have especially difficult time. Also, a lack of the necessary moisture will interfere with normal healthy root growth. In addition, if the root system does not receive enough moisture, then it will not be able to store the required amount of nutrients to cope well with the winter period.

 watering bushes

Watering the garden during dry and hot periods:

important notes for all gardeners

  • It is advisable to water it abundantly enough so that the plants have the opportunity to fully recover from the harmful effects of increased ambient temperature. This is especially true at the beginning of autumn, when the fruits have already been harvested and the root system is developing.
  • Do not water your garden plants with small doses of water. This not only will not save fruit trees and shrubs from the heat, but it can be harmful. With such watering, only the surface layer will be well moistened, which means that only those roots that are on top will develop. Therefore, trees will develop a shallow root system, and in the next drought, such shallow roots will be the first to suffer. The task of the true gardener is to form a deep root system in his garden plants. And drip irrigation is best used in garden beds and greenhouses. Ready-made drip kits make installation a lot easier.
  • Watering is necessary so deeply that the root system is completely moist. For example, apple and pear trees must be watered at least one meter deep. Berry bushes must be watered 40-50 cm deep.
  • Improper Watering – Put the watering hose near the tree trunk, turn on the water and leave the trees alone with watering. In this case, the water will spread on all sides, really getting little under the trees. The suction roots located on the periphery, namely, they absorb water, will not receive water from the hose with such abundant irrigation. All the water will go to the big “pipeline roots”. To understand where the peripheral suction roots are, you need to pay attention to the crown and draw a conditional line from it to the ground – where the crown ends, there will be peripheral roots. It is according to the projection of the crown that all fruit trees must be watered.It is also necessary to take into account the fertility of the soil – the richer and better it is, the closer to the trunk are the peripheral small roots. And the poorer the soil, the farther from the trunk small roots move away in search of moisture and nutrients. Thus, correct watering is watering the area according to the crown projection.
  • In order for the water not to spread during watering, it is necessary to make a hole in the near-stem circle. Gardening tools, which you can buy in our online store “ALL FOR IRRIGATION” by the link, will help you do it quickly and efficiently. Next, a watering hose is placed in this hole and water is turned on.
  • You need 8-10 buckets of water for one medium-sized fruit tree.
  • It is important to observe the irrigation process so that the water does not interrupt the barrier and begin to spread.
  • It is necessary to water in portions – the hole is full, the water is turned off, the water is absorbed – the water is turned on, etc.
  • To understand how much water to water from a garden hose, you need to measure with a stopwatch the time during which the water from the hose is drawn into the bucket, then multiply this number by the number of buckets required and thus you get the time it takes to water each tree from the hose in order to pour out the necessary him the amount of water.
  • Particular attention should be paid to the conifers and evergreens of the garden. In such plants, water evaporation occurs constantly, which means that they constantly need additional moisture.
  • It is important not to overdo it with watering. Large amounts of water can also displace the air and oxygen needed by plants from the soil.
  • To understand whether there is enough moisture in the soil, you need to take a shovel and dig out a small lump of earth and take it in your hand – if the soil is dry, then there is really not enough moisture; if the earth is collected in a lump, then there is enough moisture in the soil; if the dirt flows down, it means that the soil is waterlogged.
  • Autumn watering during the dry period can and should be combined with plant feeding – all nutrients will get to all roots in the maximum amount, thus preparing garden plants for the winter period. You can find out how to carry out winter moisture-proof watering in the article at the link.